formula

Seasonal Swap Out: Baked Fruit Desserts

Seasonal Swap Out: Baked Fruit Desserts

You won’t need another baked fruit recipe ever again because this post has you covered from berries and rhubarb to peaches and apples. With 6 baking variations (crisp, crumble, cobbler, pie, galettes, and crumb pie) that can be applied to at least 12 fruits, that’s 72 potential desserts for a year-round sweet tooth.

Herb Infused Syrups

Wait! Stop! Despite what you’ve been told, you should not wrap your freshly harvested herbs in paper towels and store them in your freezer for future use. Let’s be real, you won’t use them. The future leaves, brittle and flavorless, won’t resemble the fresh greenery they once were, and this is a tremendous waste of paper towels, plastic bags and freezer space! Transform those herbs into something that is preservable, portable and ripe with many uses. Some typical creations include pesto, chimichurri, salad dressings and marinades, but have you tried herb infused syrups for use in cocktails, mocktails or baked goods? This recipe requires only about 5 minutes of active time, 3 ingredients [including water] and produces something with countless uses that lasts for months.

Herb Infused Simple Syrups

Yield: 1 cup syrup

What You Need:

  • ½ cup sugar

  • ¾ cup water

  • 1 loosely packed cup of leaves of mild herbs such as mint, thyme, and basil or ½ cup stronger herbs such as rosemary, lavender and sage

What You Do:

  1. In a small pot, combine sugar and water. Over high heat, stir until sugar dissolves. Add the herb leaves and bring to a boil. 

  2. Remove from heat and allow herbs to steep and cool for about 30 minutes.

  3. Strain through a fine mesh strainer. Discard the solids.

Note: For a more concentrated, thicker syrup to use in or on baked goods in place of corn syrup, maple syrup or honey, return to stove. Heat on medium high for 5 minutes until reduced and syrupy.

To freeze: Transfer to small jars or plastic containers with tightly fitting lids. Due to the sugar content, the liquid will not freeze completely solid. You can freeze in ice cube trays and then transfer to plastic bags, but beware that cubes will remain slightly soft. Use within 6 months.

Variations:

Ginger Syrup - Use ½ cup sliced ginger root instead of herbs or in combination with herbs to make ginger syrup. Ginger + Mint is particularly nice.

Rhubarb Syrup - Add one stalk of rhubarb, cut into 1 inch chunks. Rhubarb + Thyme is a great pairing.

Citrus Syrup - In place of some of the water, use ¼ cup orange juice or 2 tablespoons lemon juice. You should still have ¾ cup total liquid. Sage + Orange is a great combination. Lemon + Lavender is another.

Whole Grilled Fish with Fresh Herbs and Citrus

aSpoBkrrR9GQ%2B%2BcvpLmqcg.jpg

I used to be intimidated by recipes calling for whole fish, even after growing up with a fishing rod tucked under my arm, and even after culinary school where we covered all things fin fish. Last summer, I explored grilling whole fish. It was a lot less intimidating to work with them outdoors on a gas grill. I’ve since tested and adapted these recipes for indoor cooking, because let’s face it, we all don’t have the option of grilling all the time.

This is the start to a perfect summer night meal, when you want to expel as little effort as possible to eat something light and full flavored. Pair with some grilled vegetables or a salad and you’re a star, a sea star.

What follows is a formula for simple whole grilled fish with herbs and citrus served in 5 of my favorite ways (just updated with a new favorite). You can easily modify this formula to fit your favorite flavor combinations, seasonally available produce and local flavor. Or you can jump straight to my recipe for Whole Grilled Trout with Cilantro, Mint, Nam Pla Prik, and Cashews, which you won’t regret one bit.

WHOLE GRILLED FISH WITH FRESH HERBS & CITRUS - 4 WAYS

  1. Lemon + Parsley + Garlic + Pepper + Olive Oil garnished with Hazelnuts

  2. Orange + Parsley + Oregano + Olive Oil garnished with Olives + Capers

  3. Orange + Lime + Cilantro + Serrano + Cumin garnished with Avocado + Tomato

  4. Mint + Cilantro + Thai basil + White Pepper + Kaffir Lime Leaf garnished with Toasted Cashews + Nam Pla Prik Thai Chili Lime Sauce

  5. Preserved Lime or Lime + Ras el Hanout + Parsley

Serves: 4 - 6

What You Need:

  • 3 small whole fish, such as branzino, trout or red snapper, scaled, cleaned, & heads removed or butterflied, about 1 pound each

  • ¼ teaspoon sea salt

  • ¼ - 1 teaspoon ground pepper or other spices or spice blends

  • 1 - 2 bunches of fresh herbs

  • 2 - 3 limes, lemons or oranges, sliced or juiced for dressing

  • 1 tablespoon oil

  • ¼ cup nuts, lightly toasted

  • 1-2 chili peppers, such as jalapeno, serrano or Thai bird’s eye chili, thinly sliced

  • ¼ - ½ cup olives, pickles, capers, or caper berries

What You Do:

  1. Sprinkle sea salt and spices on the insides of the fish. Stuff each fish with few herb sprigs (leaving stems intact) and a few citrus slices.

  2. Brush the outside of each fish lightly with canola oil.

  3. Heat a grill on high heat.

  4. Meanwhile, prepare any sauces or garnishes. Juice or slice the remaining citrus, toast nuts, slice peppers, tomatoes or other fruits, pluck herb leaves from the stems and discard stems.

  5. Grill the fish over high heat, turning once, 6-7 minutes per side or until skin is crisped and flesh is flaky.

  6. Serve immediately garnished with toasted nuts, additional citrus, herb leaves, and more per suggestions above.

No grill? No problem. You can also cook this whole fish under the broiler in a cast iron skillet or broiler safe pan. Heat the pan under the broiler for about 10 minutes. Add the prepared fish to the pan and place back under the broiler for about 6-…

No grill? No problem. You can also cook this whole fish under the broiler in a cast iron skillet or broiler safe pan. Heat the pan under the broiler for about 10 minutes. Add the prepared fish to the pan and place back under the broiler for about 6-7 minutes. Flip and cook an additional 5-6 minutes on the other side.

Pantry Clean-Out Granola

I’ve been baking my own granola for years now, usually inspired by the odds and ends I find when cleaning my pantry. It’s incredibly satisfying to empty the remnants of bags of nuts, a tub of dried mystery fruit, a jar of cinnamon, and a rubber-band wrapped package of quinoa in one fell swoop! In the process, I create a wide open pantry shelf AND breakfast of champions for weeks!

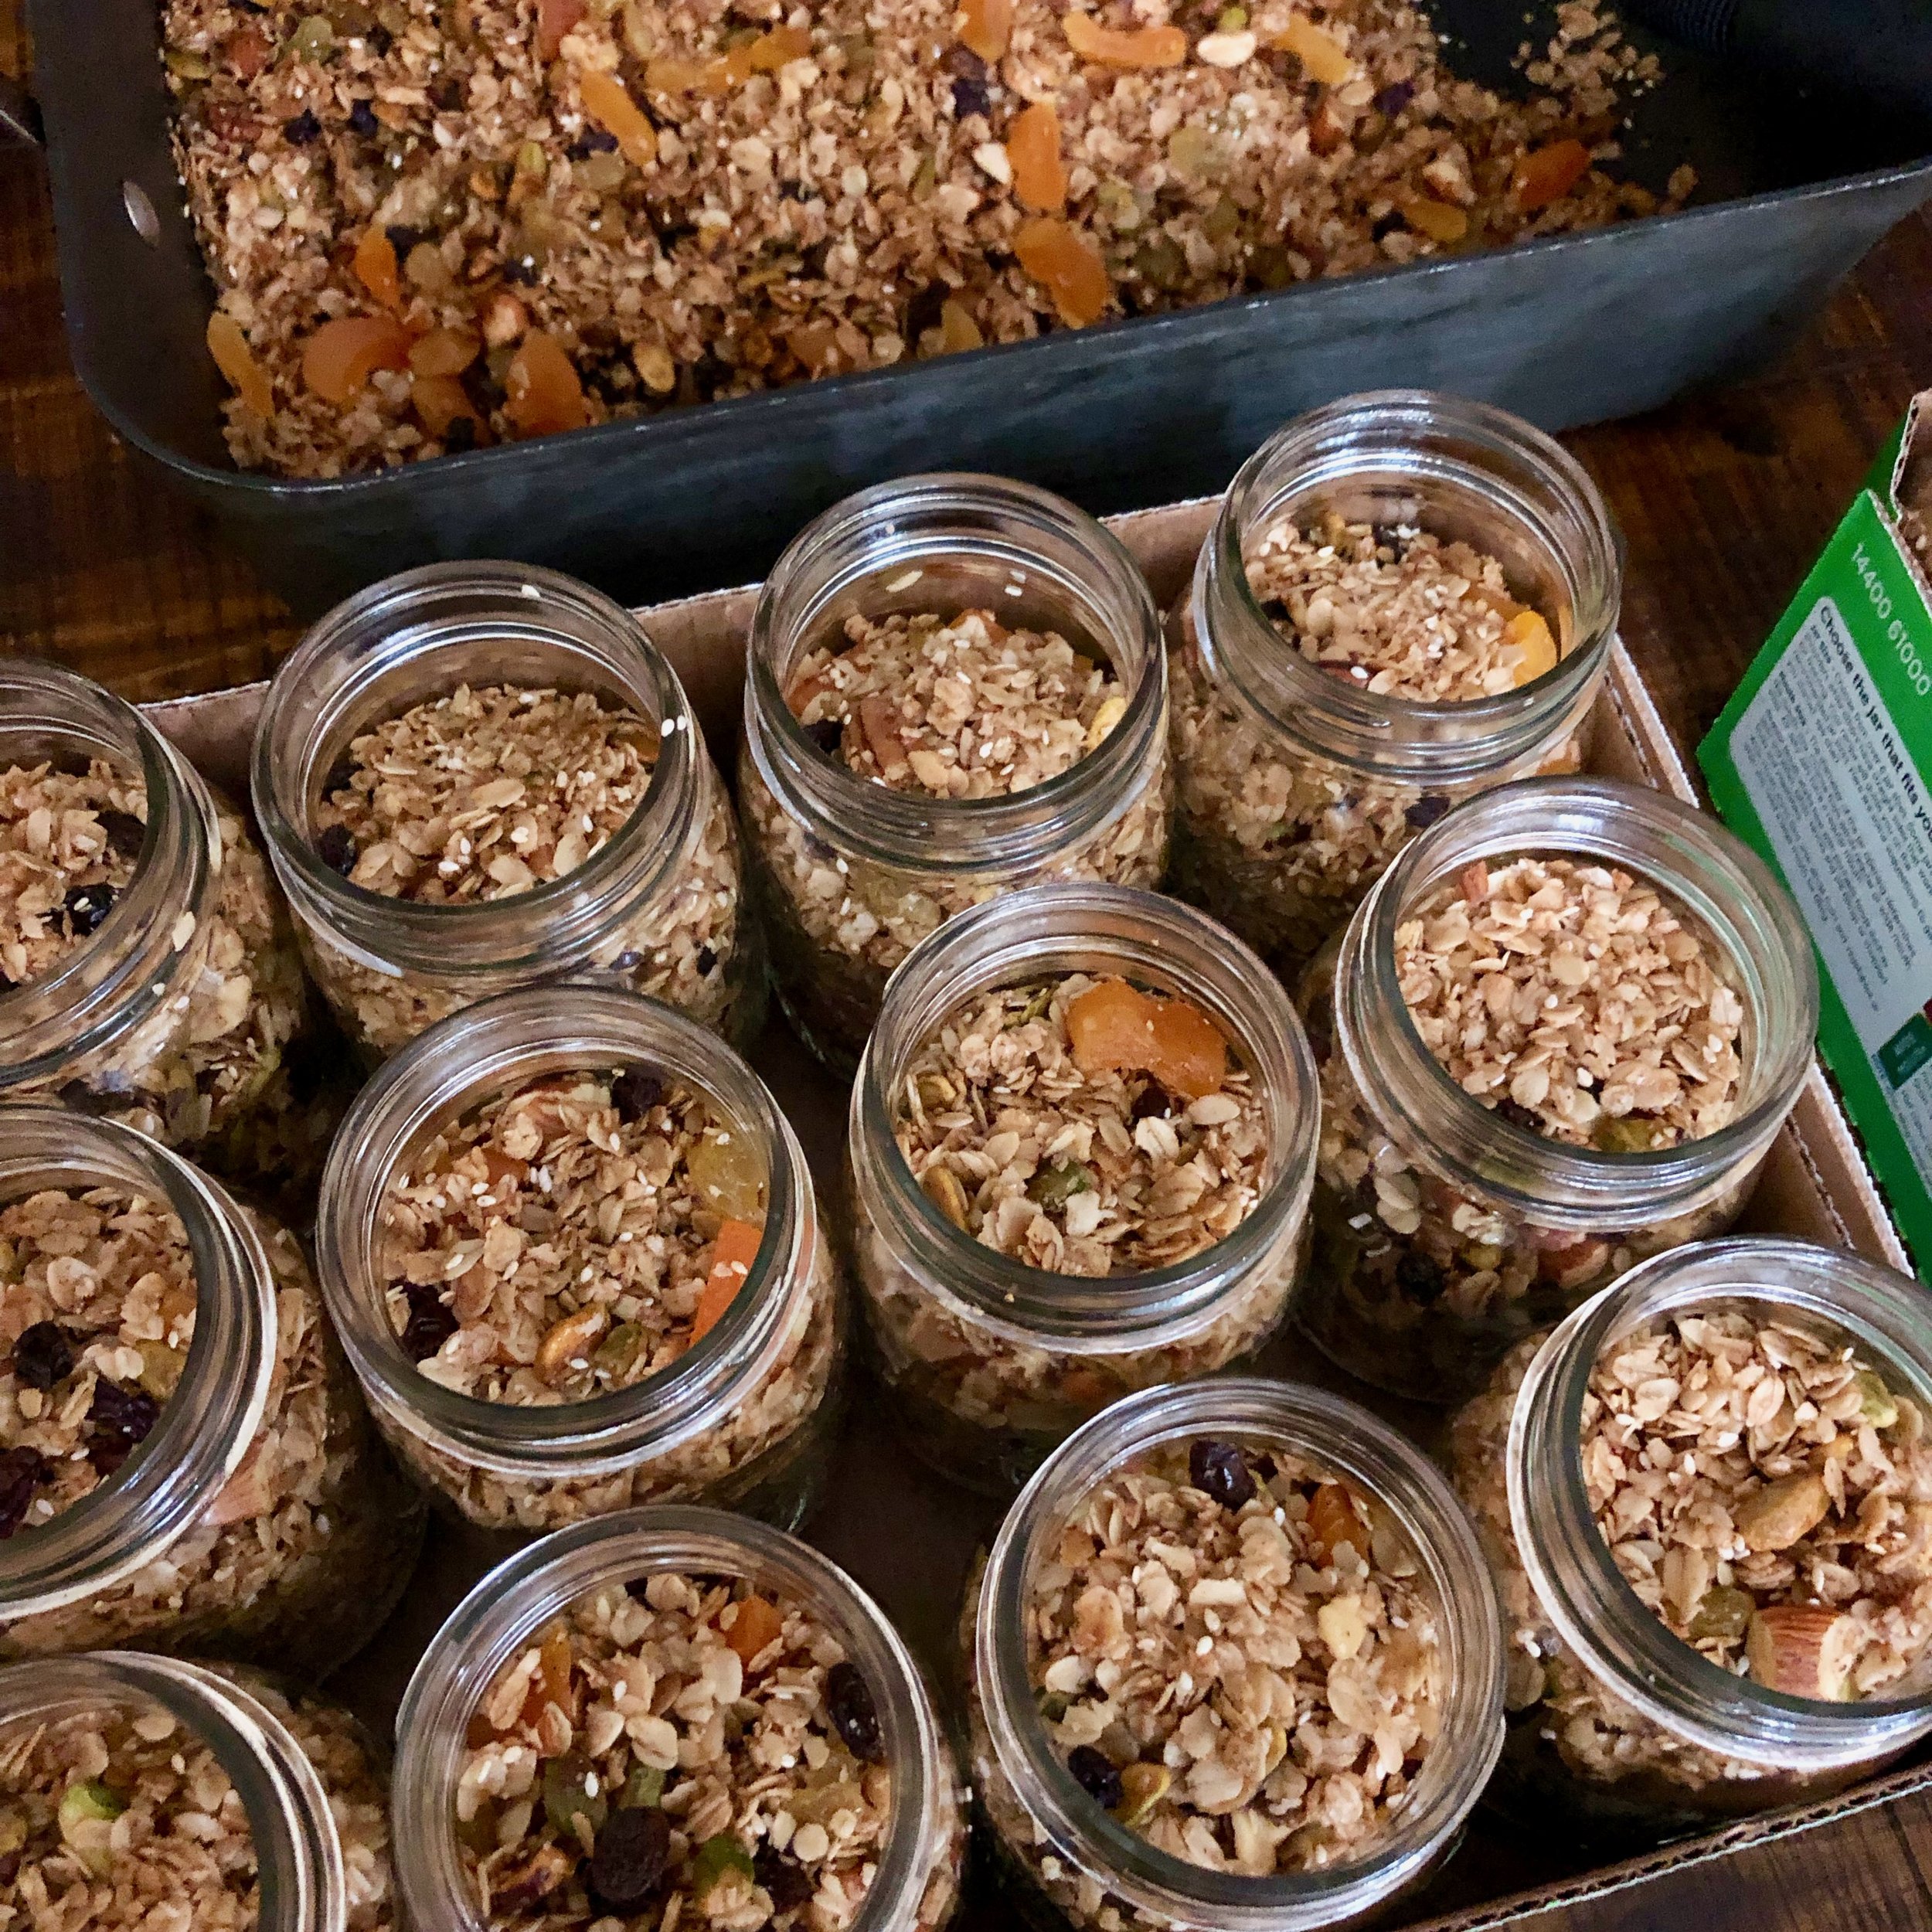
Armed with some photos I took during the recent production of 60 jars for a dear friend’s wedding, I’m finally putting this granola “recipe” on the Teaching Table blog.

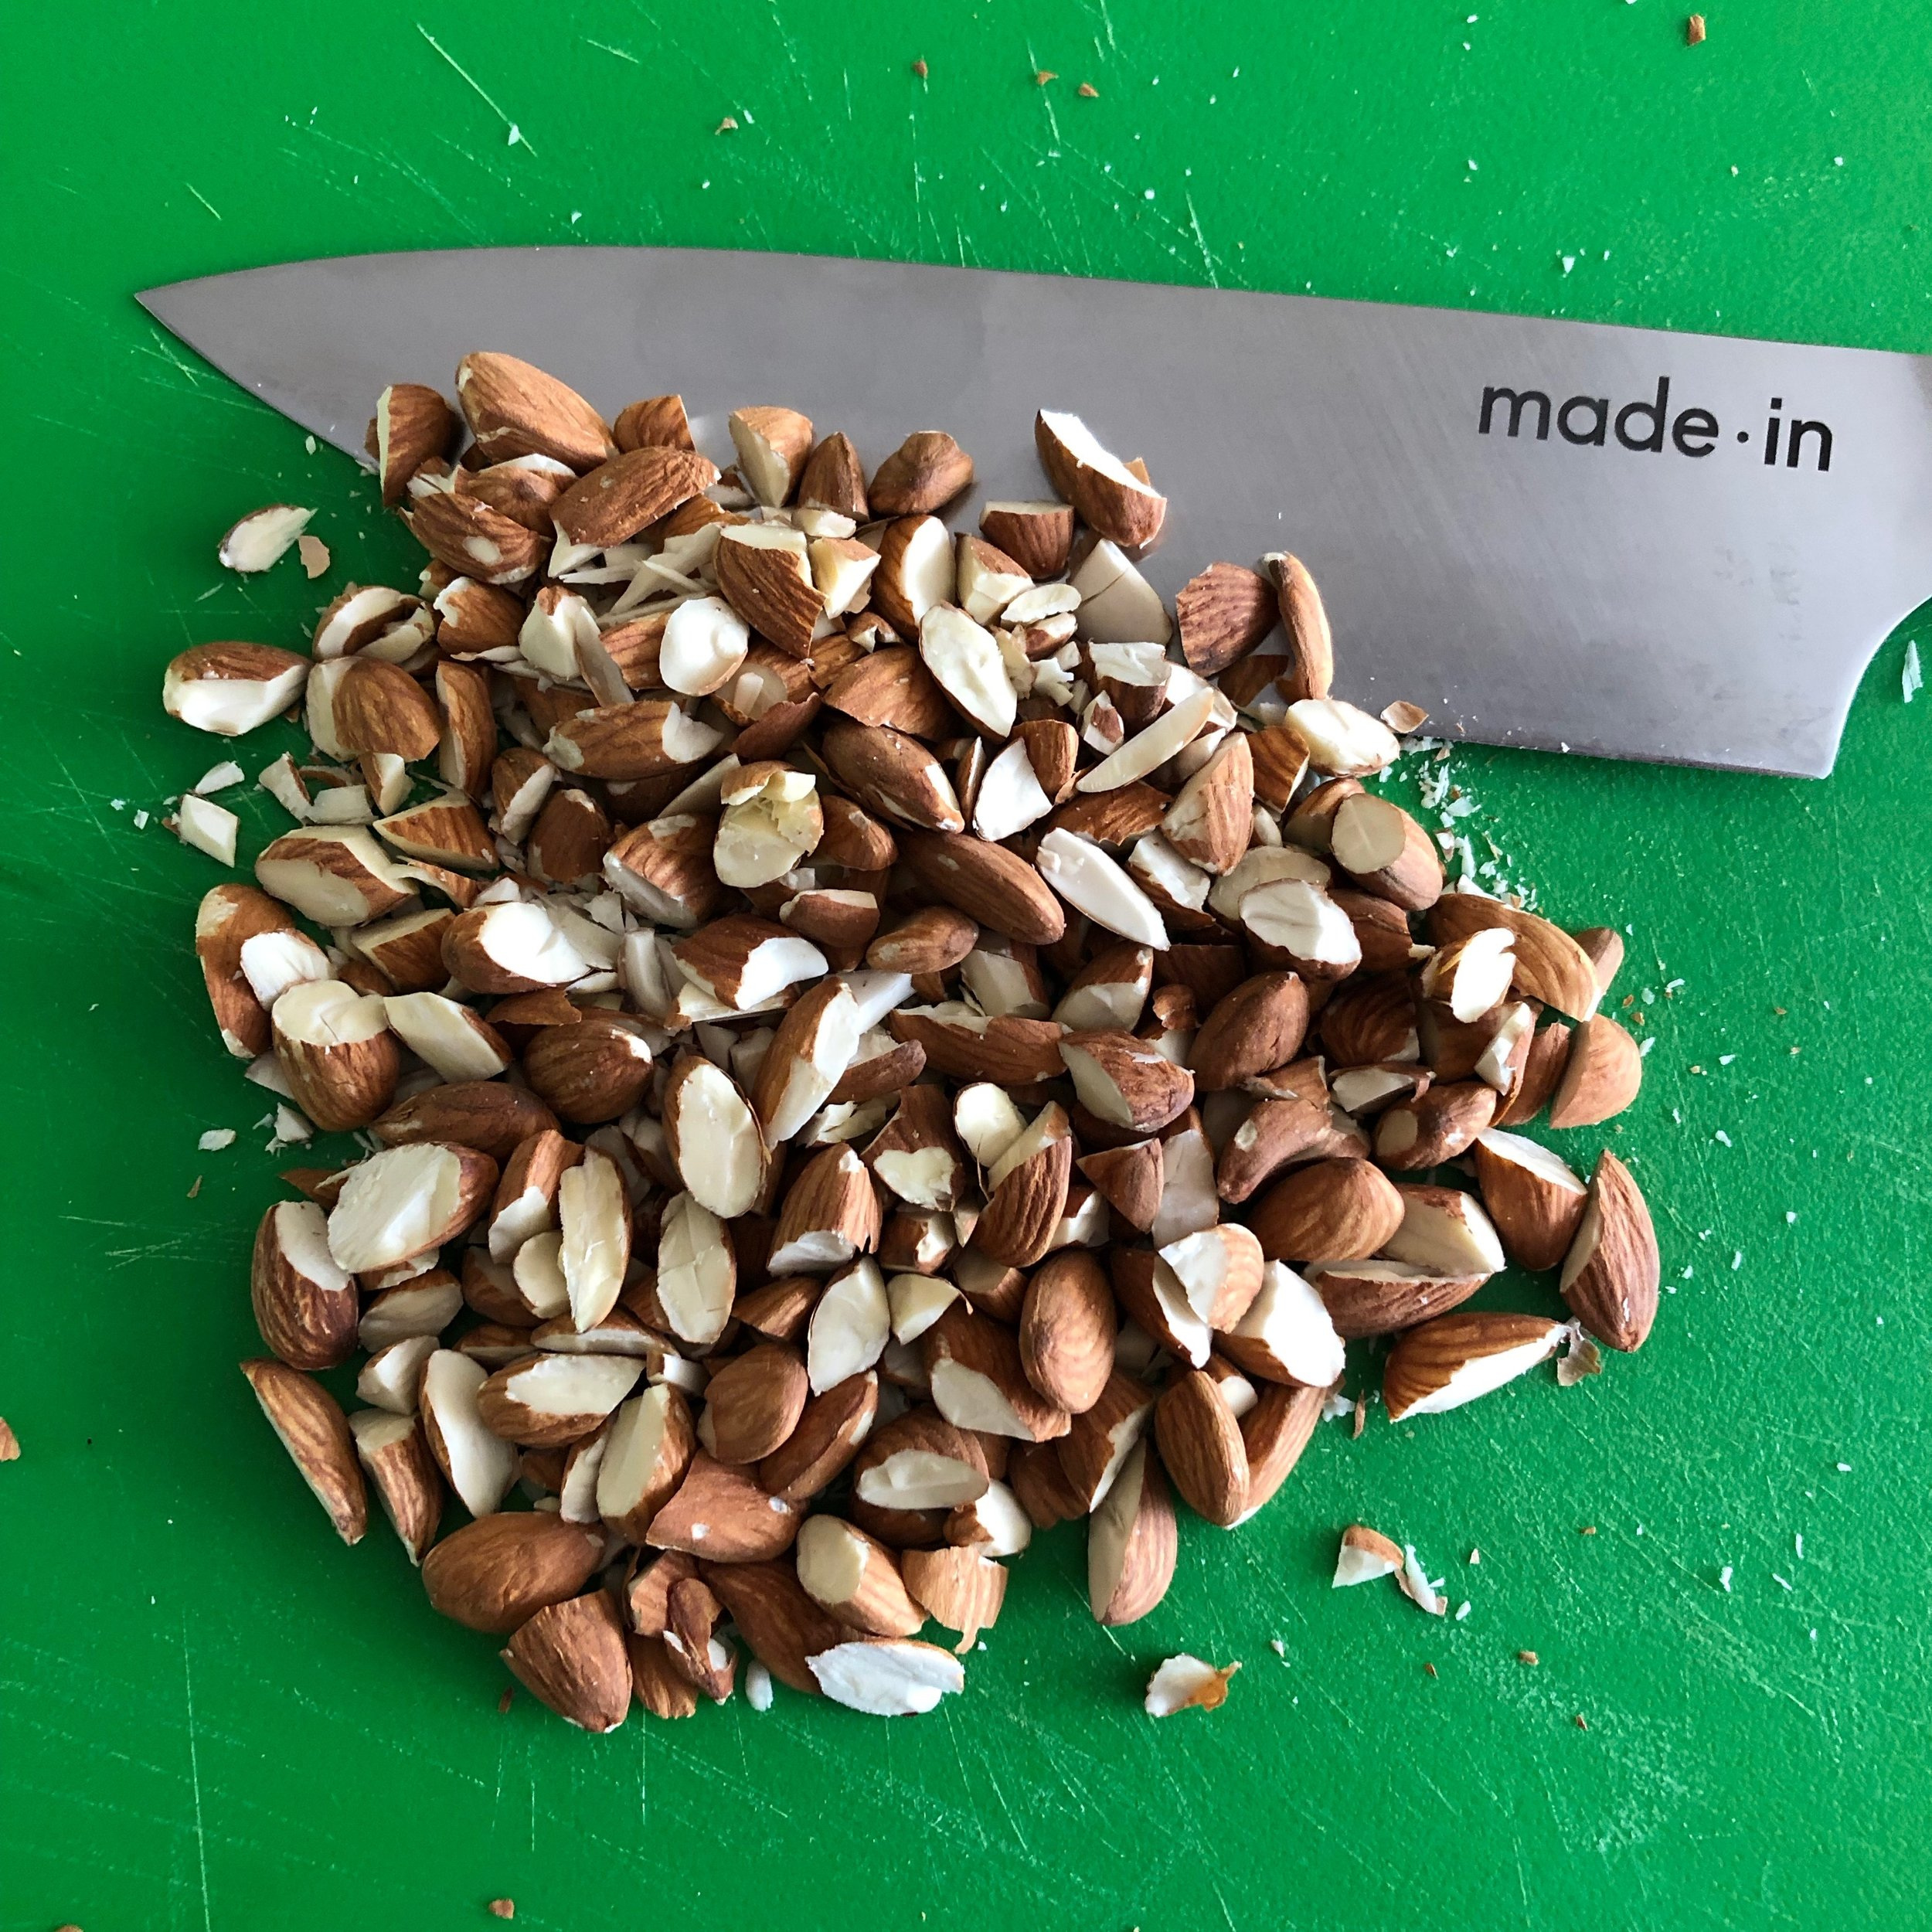
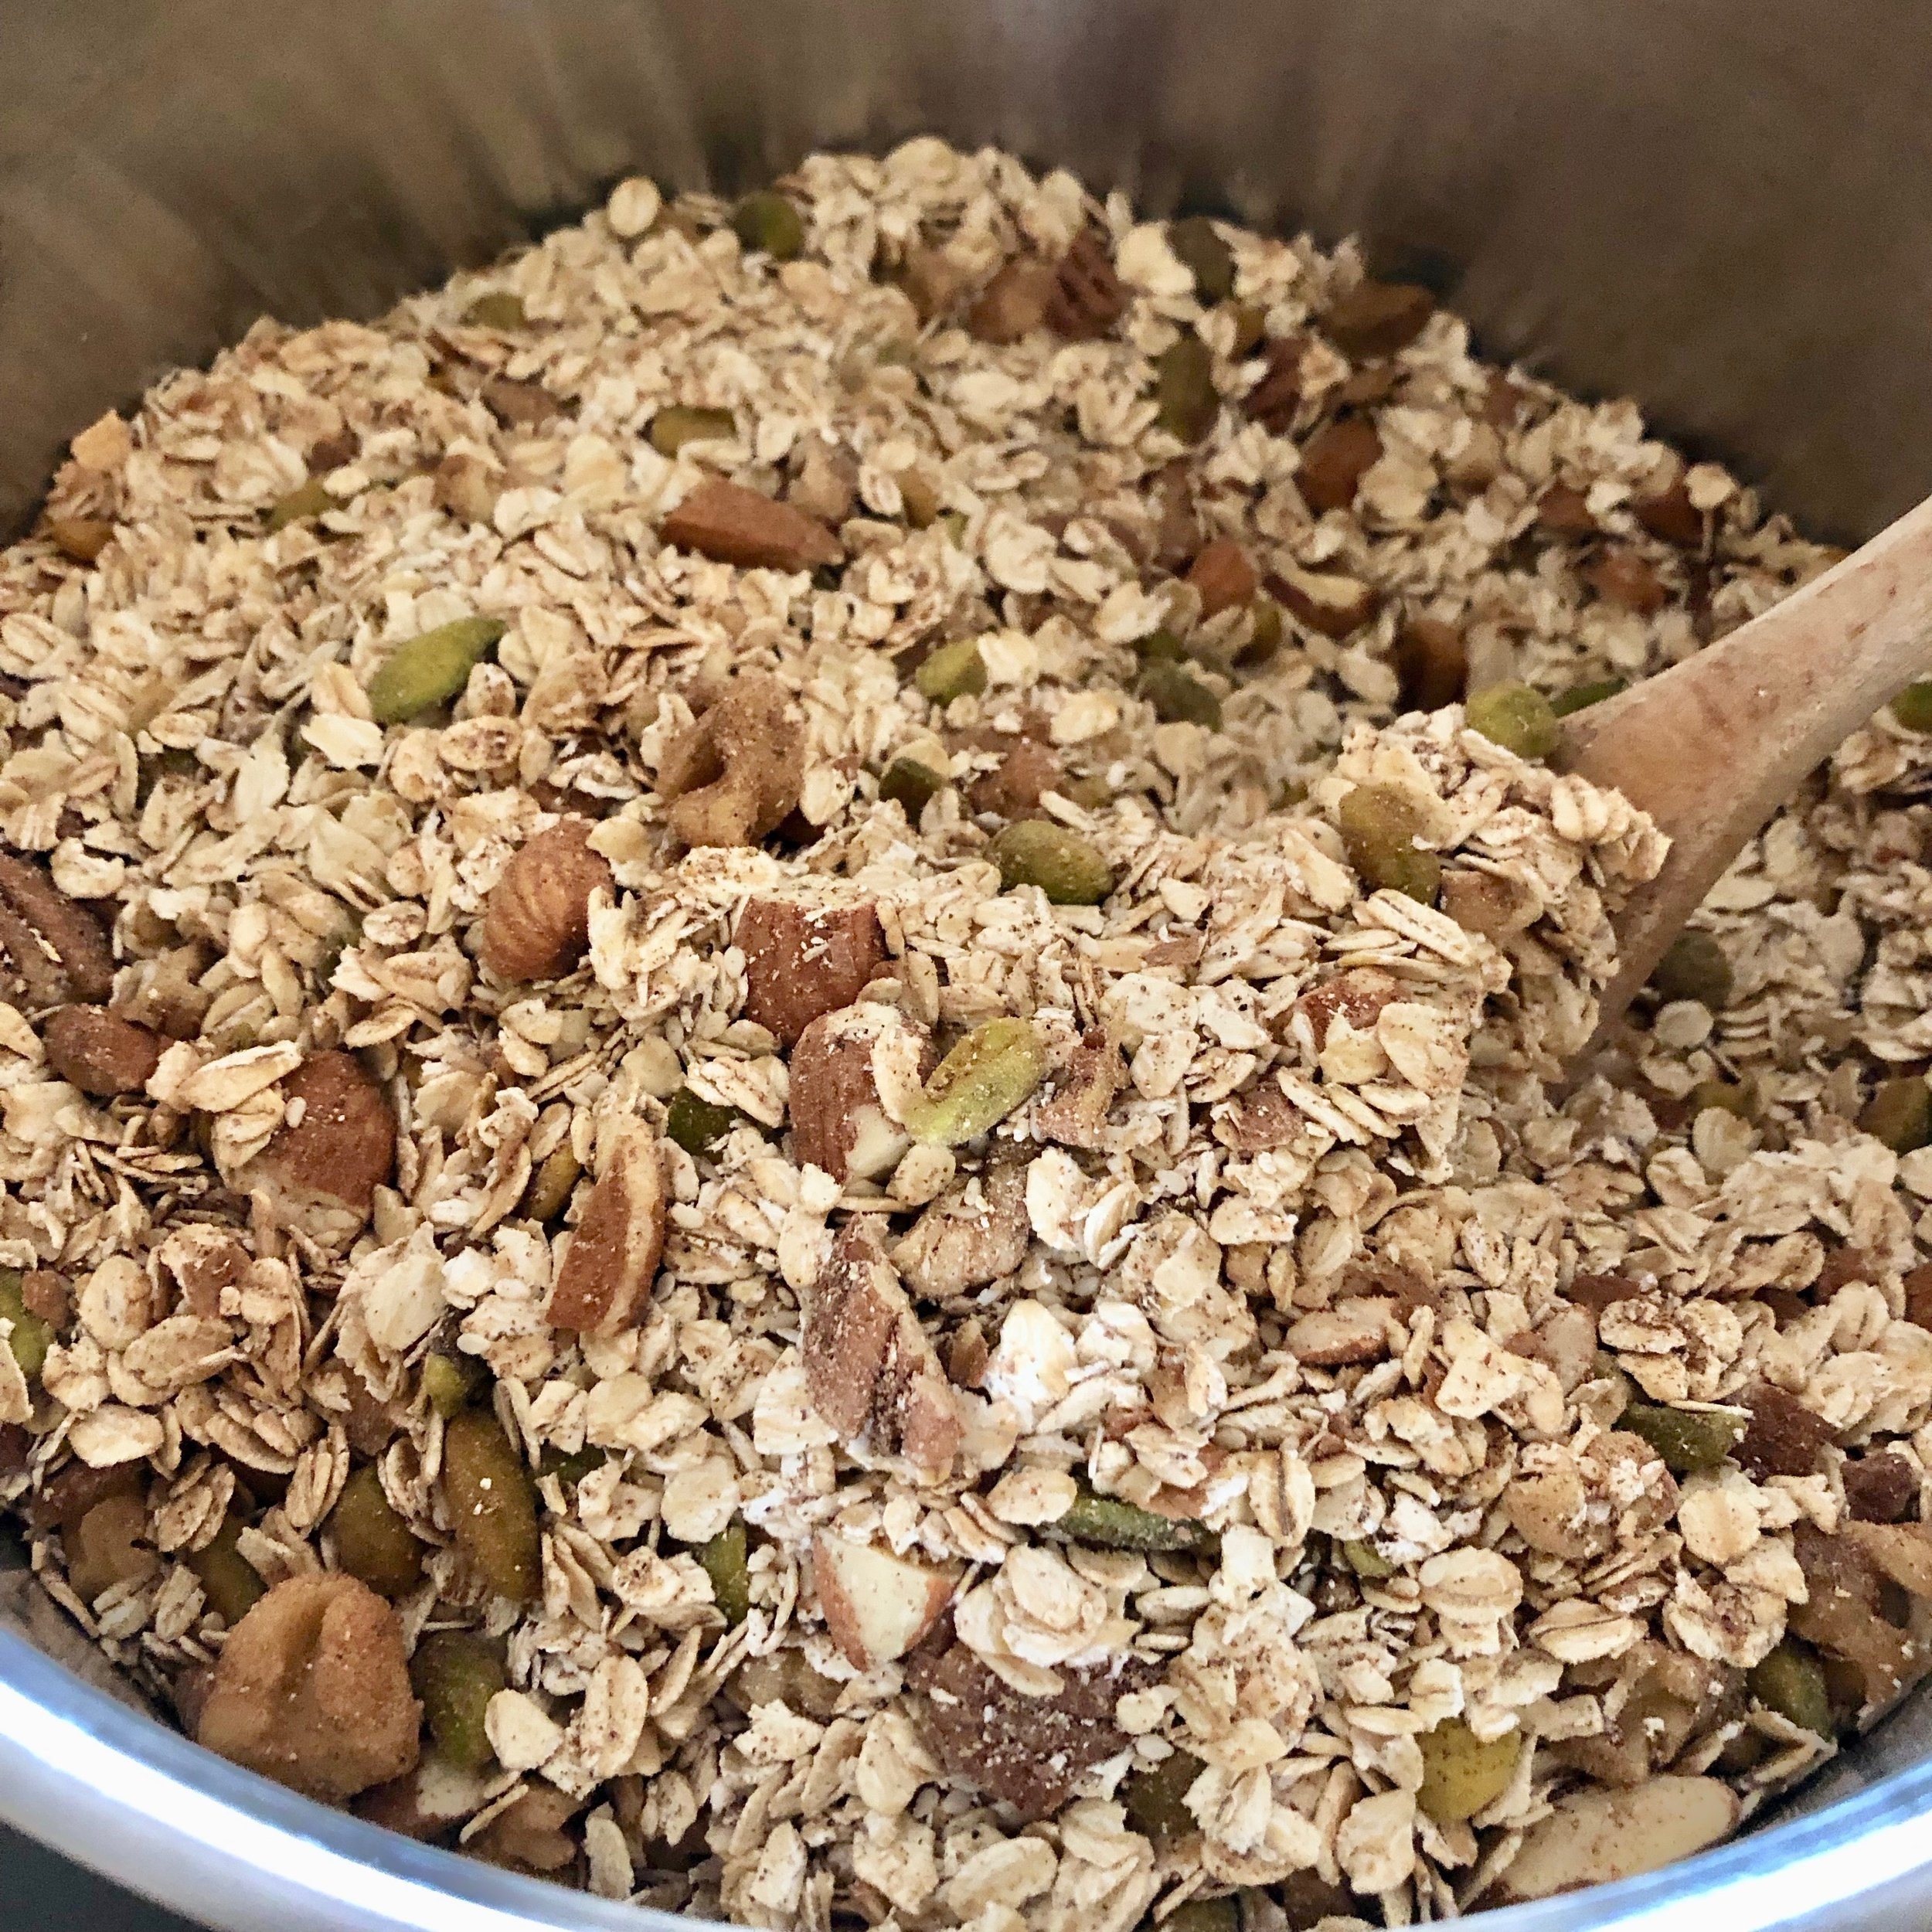
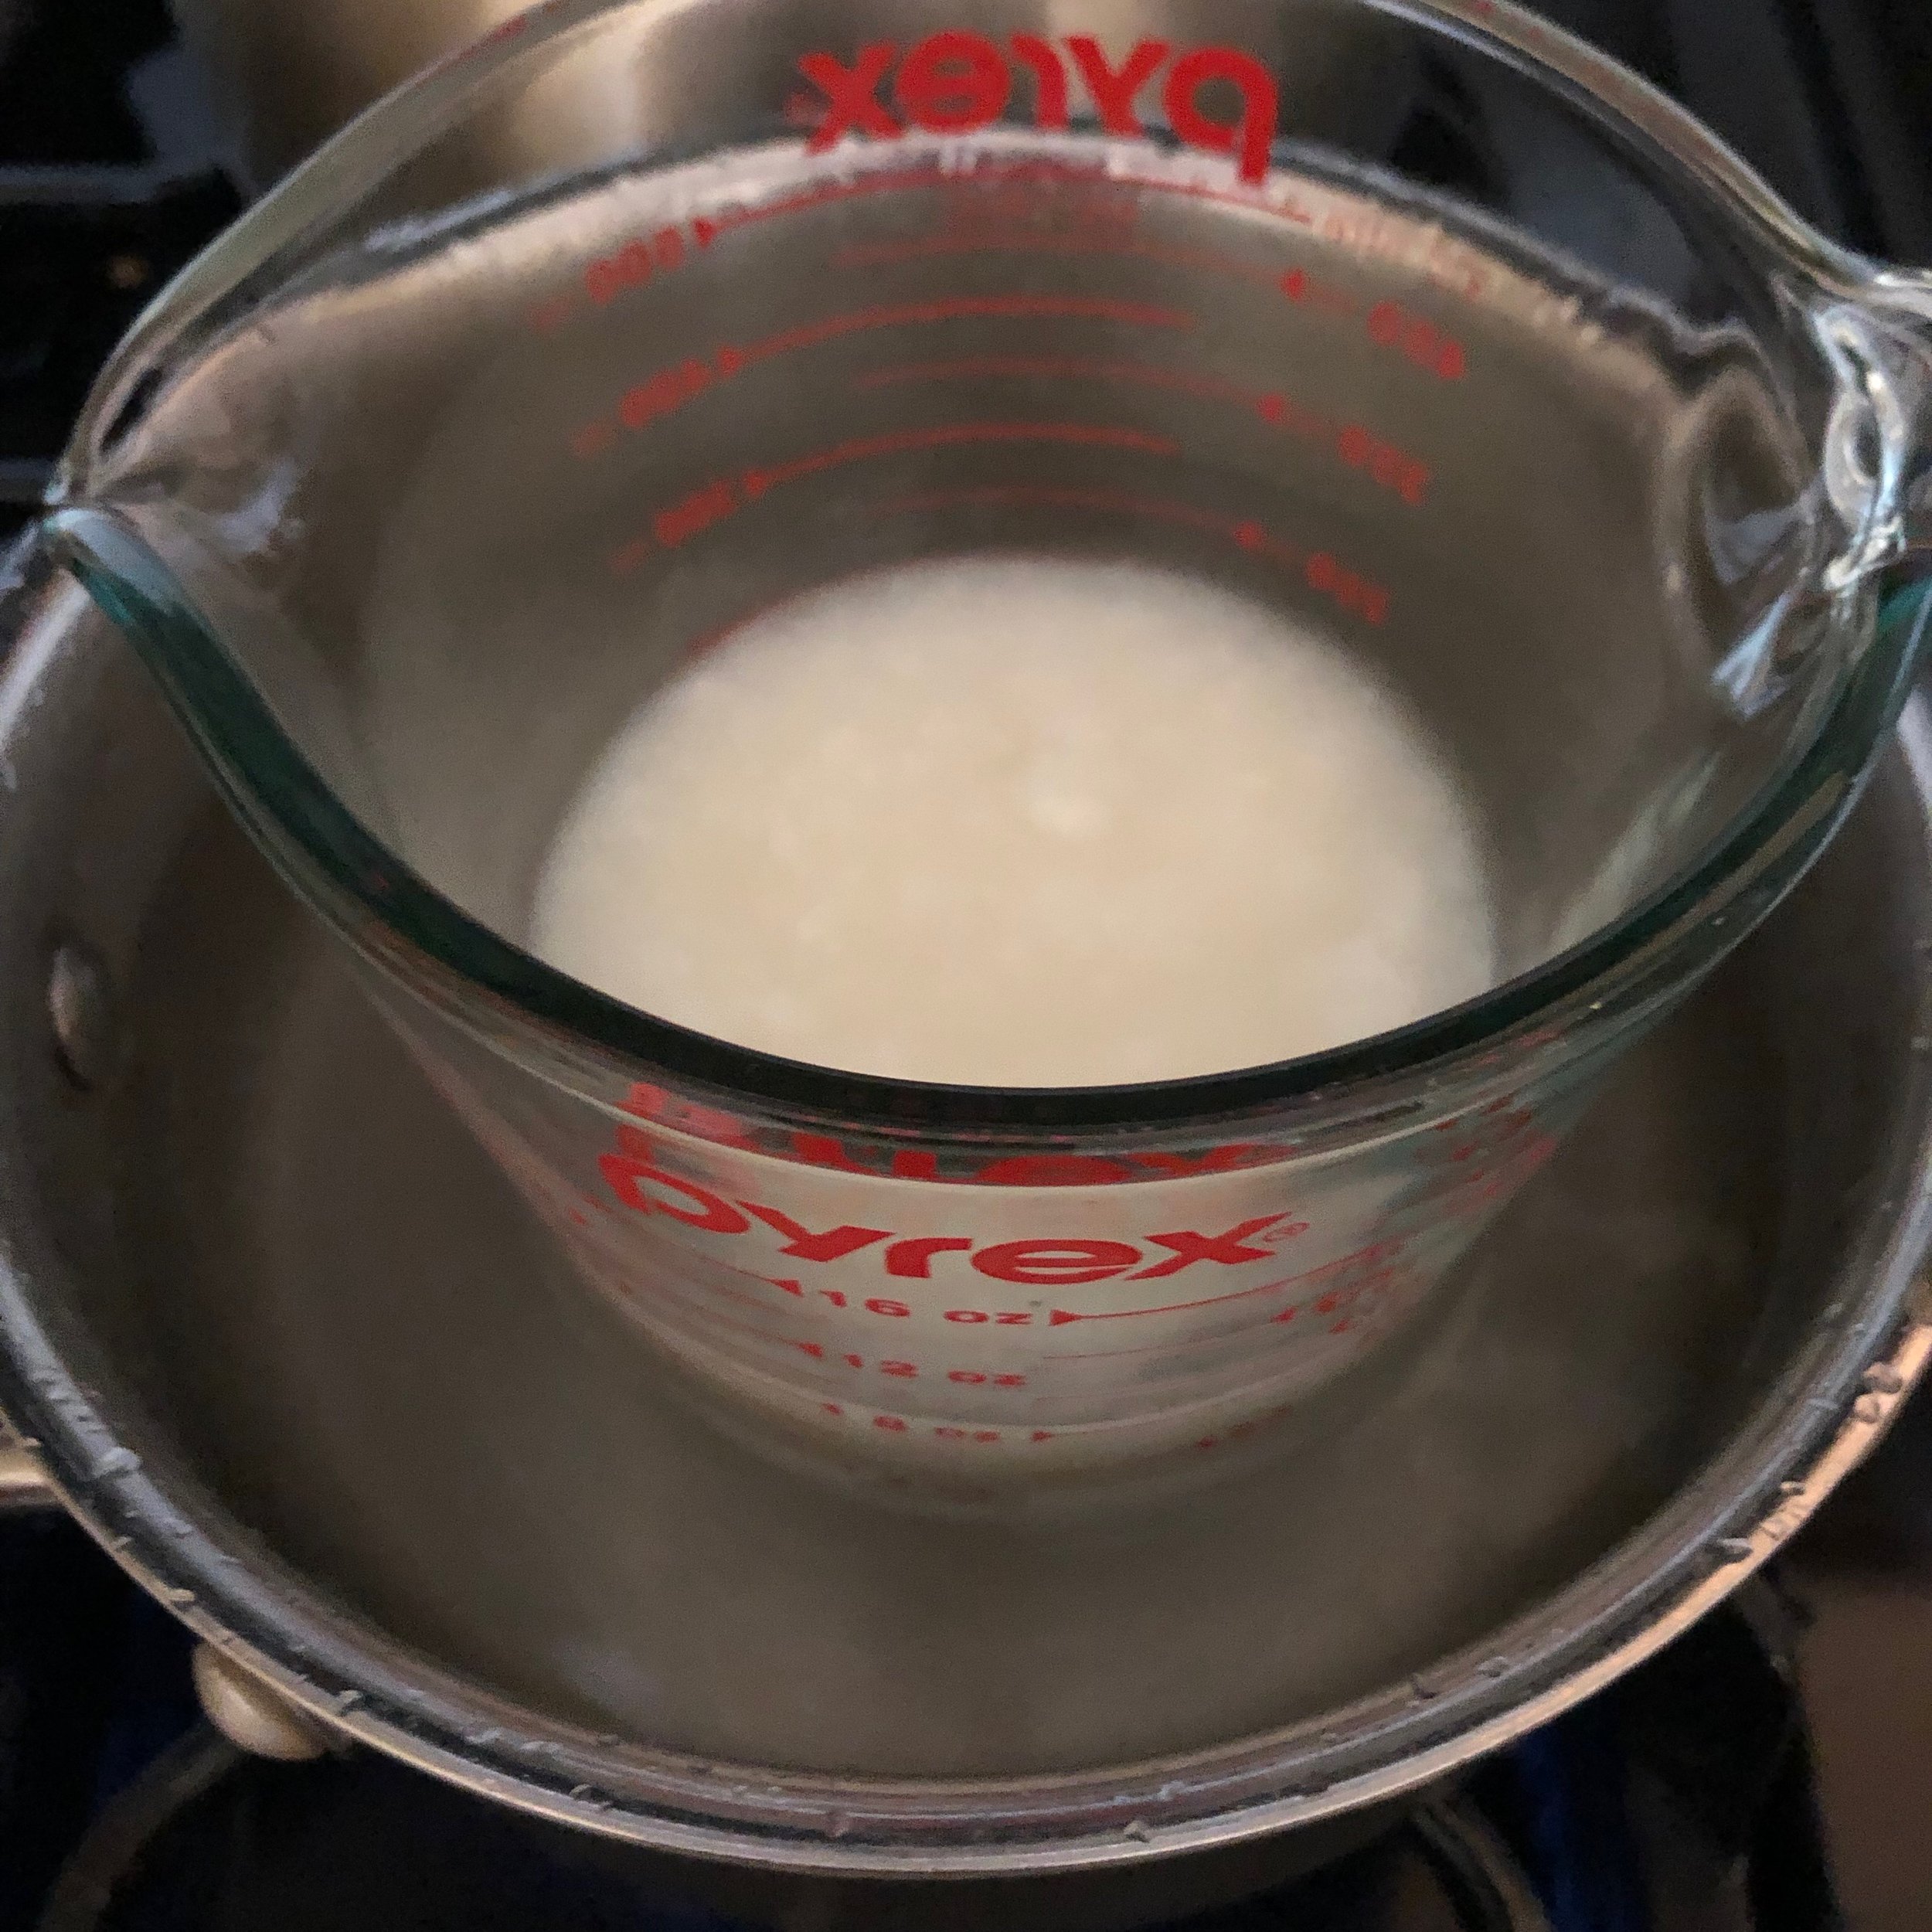
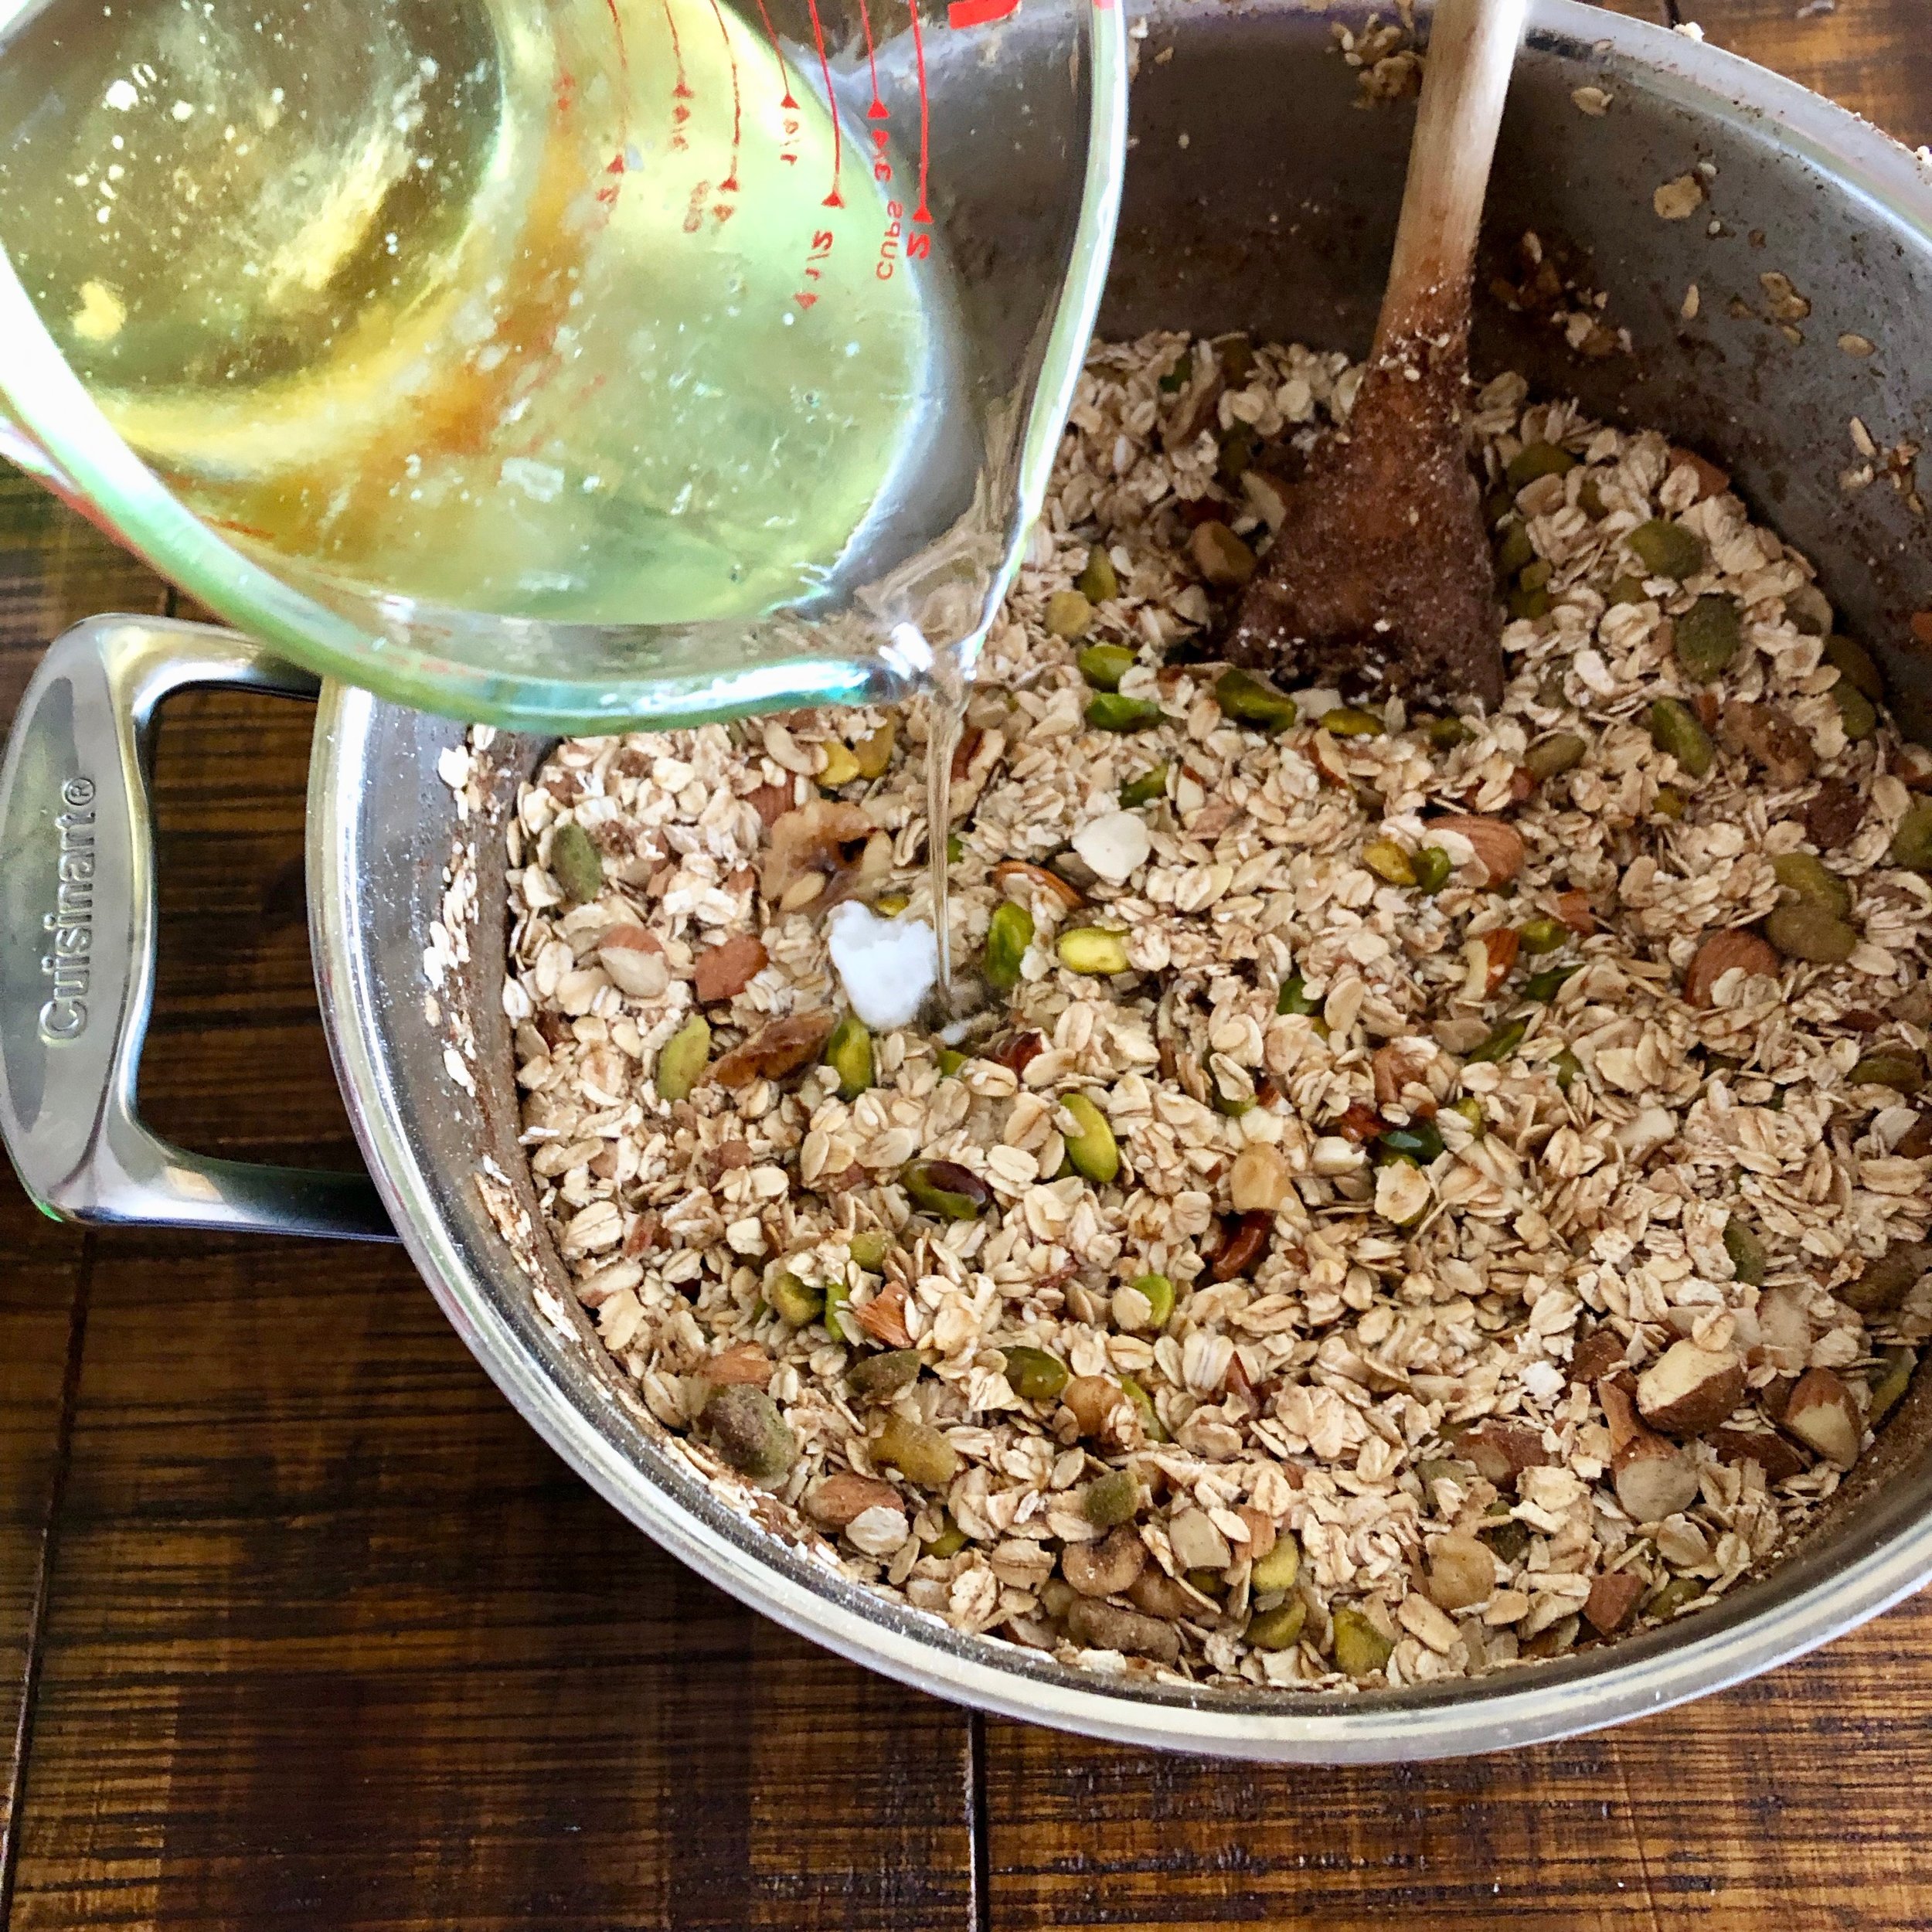
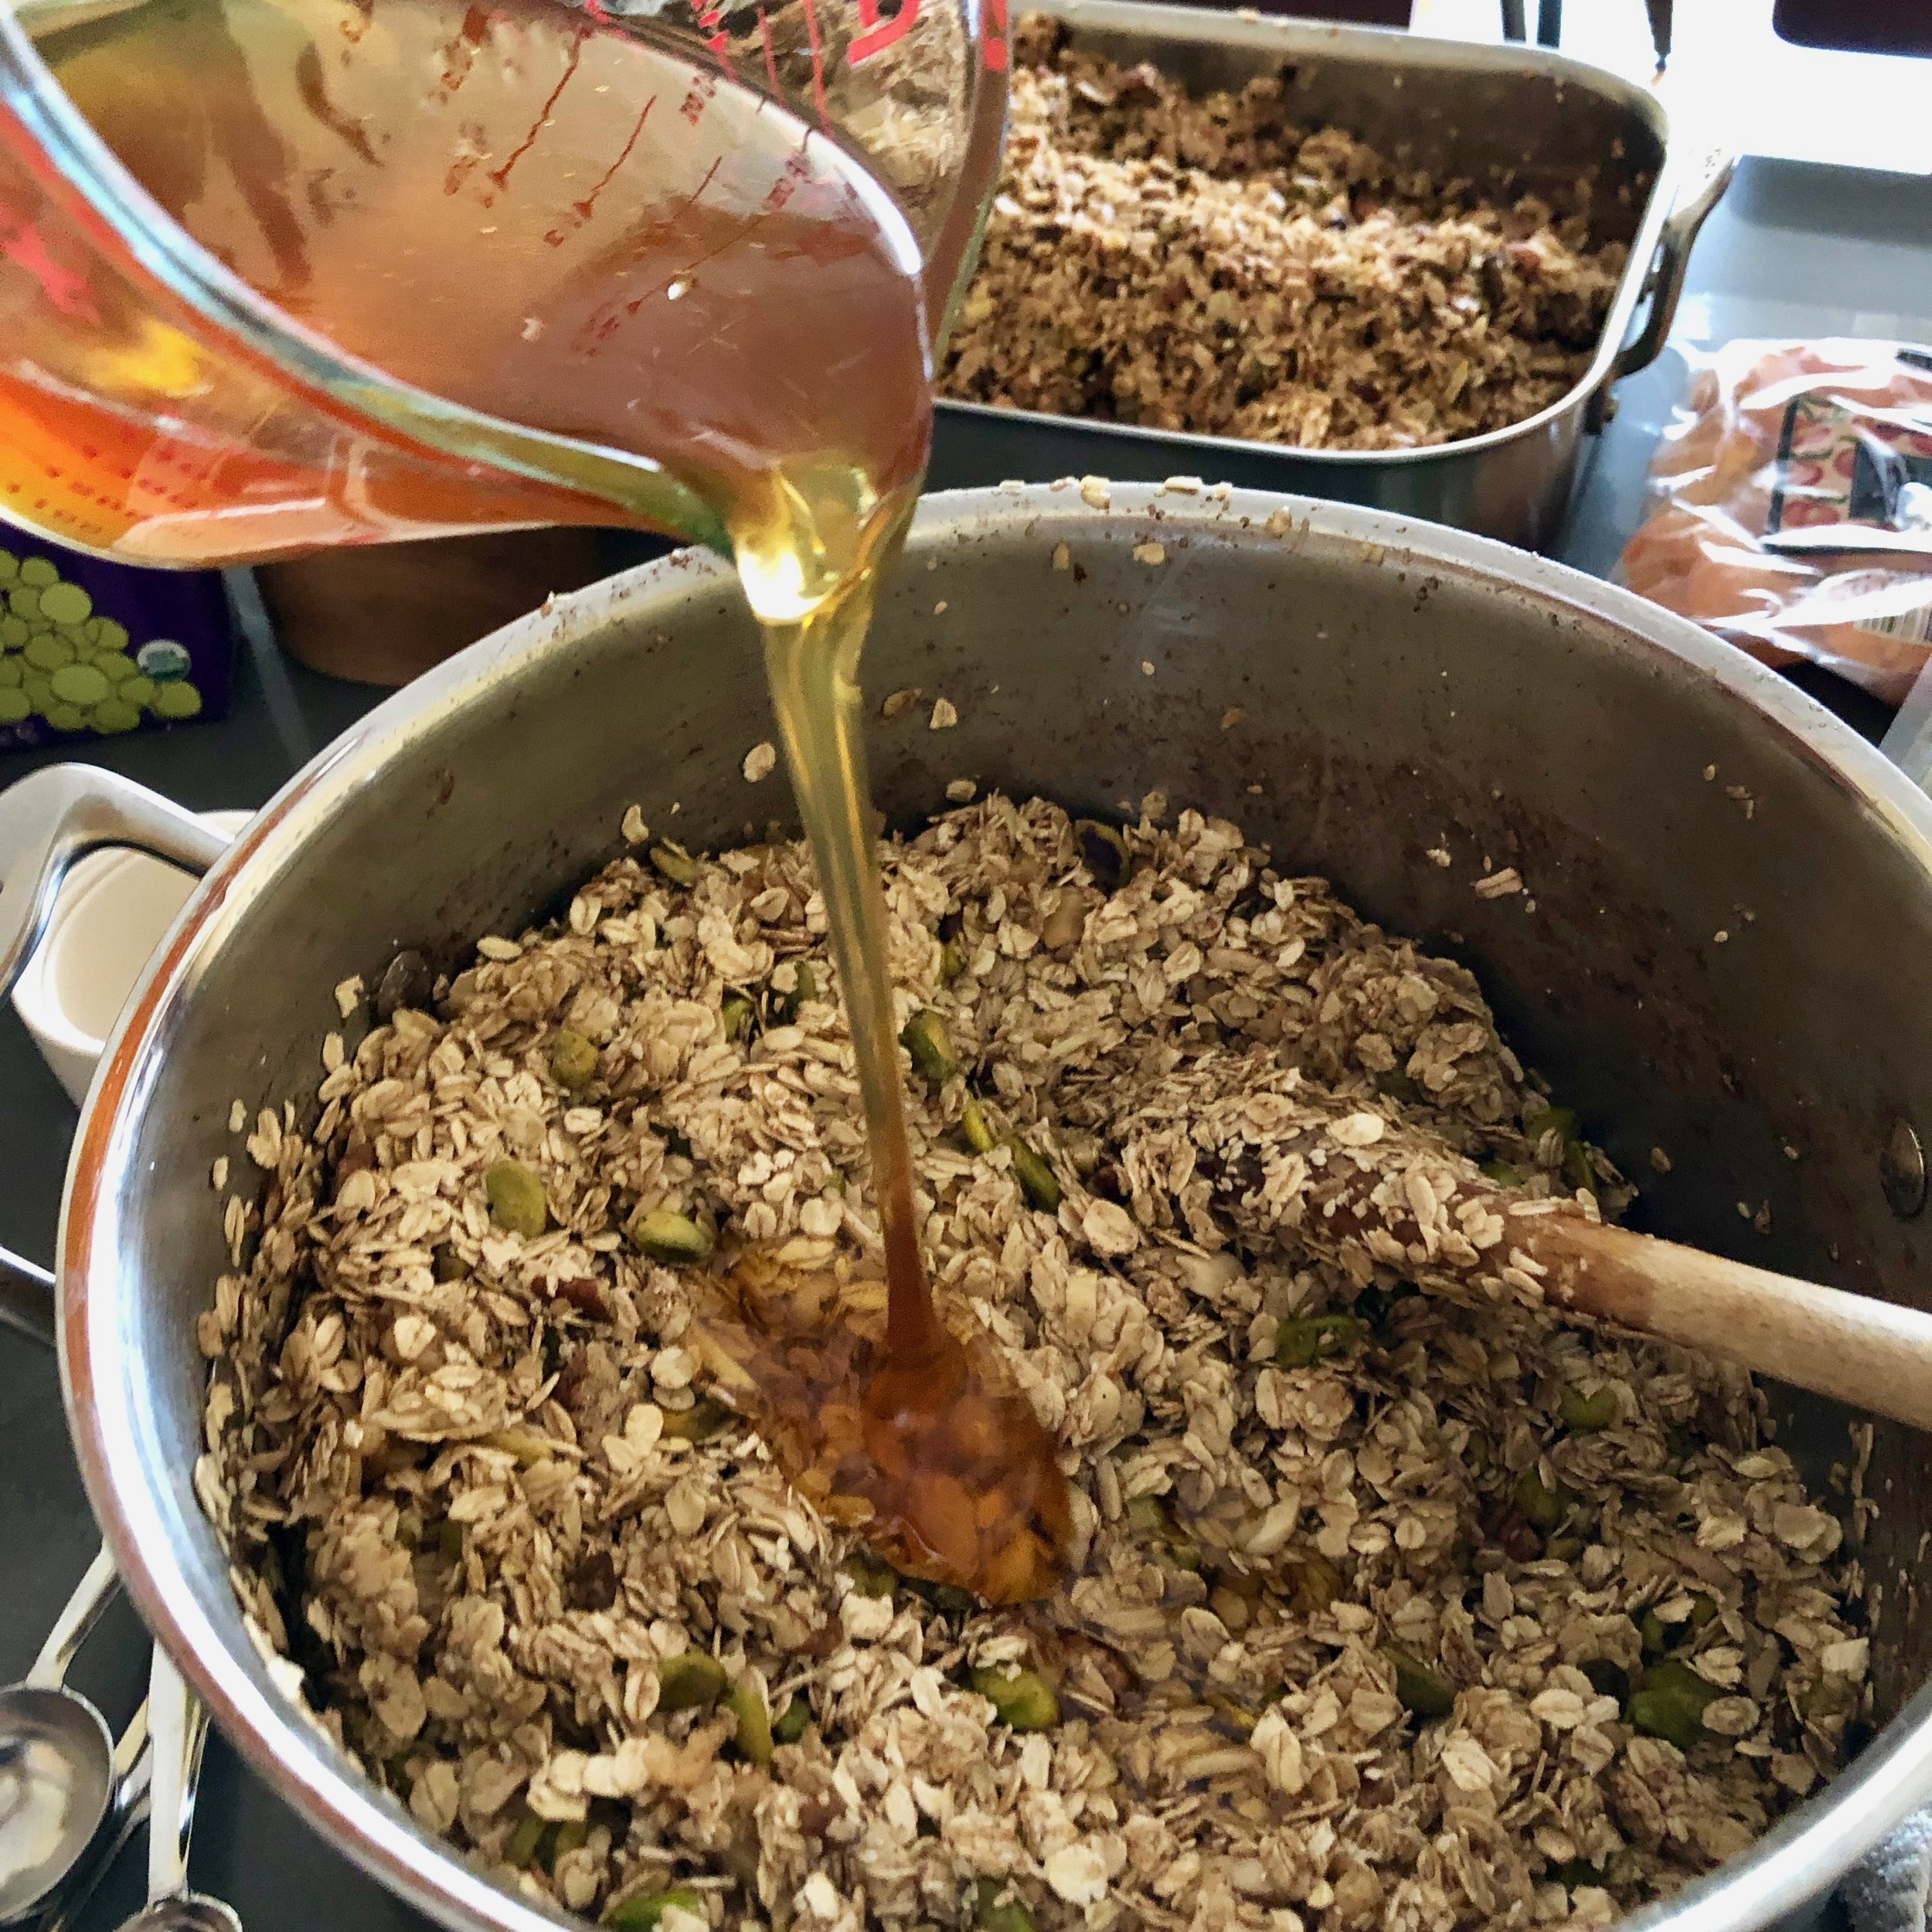
As the air quotes suggest, this is barely a recipe but rather a set of suggestions and instructions for assembling goodness out of any combination of nuts & dried fruit, spice, seeds, oil & sweetener. Mix and match to create a personalized granola that suits your taste and needs (or uses what you find in the back of your pantry). You can even adjust the ratios of the dry ingredients. The amounts are relative — another vote for this solution to reduce food waste! Here’s a basic formula.

Tip: For an even crunchier granola, add 1 beaten egg white to the oats mixture.

Pantry Clean-Out granola

What you need:

Ingredients for Shannon & Dylan’s Signature (vaguely Morrocan) Granola.

Ingredients for Shannon & Dylan’s Signature (vaguely Morrocan) Granola.

  • 2 ½ - 3 cups rolled (not instant nor steel cut) oats

  • ½ - 1 cup whole grains such as quinoa, millet and amaranth

  • 2 - 4 tablespoons seeds, such as sesame, chia and flax

  • 1 - 2 teaspoons of ground spice, such as ginger, cinnamon, or cardamom, or powders like cocoa and matcha tea

  • ½ - 1½ cups nuts, such as almonds, hazelnuts, walnuts, cashews and pistachios

  • ½ cup oil (melted coconut, canola, hazelnut, pistachio, grapeseed, or olive oil)

  • ⅓ cup sweetener in syrup form, such as honey, agave or maple syrup

  • ½ cup dried fruit, such as raisins, tart cherries, apricots, figs, peaches or apples, ¼ inch dice

What you do:

Some of my favorite combinations:

All of these start with rolled oats…

  • walnuts + cinnamon + canola oil + maple syrup + dried apples

  • pistachios + almonds + cardamom + sesame seeds + coconut oil + honey + dried apricots

  • almonds + cocoa powder + nut oil (hazelnut, walnut) + agave + dried cherries

  • cashews + ginger + quinoa + coconut oil + agave + coconut flakes + dried mango

  • matcha tea powder + cashews + coconut oil + agave + golden raisins

  • walnuts + pistachios + cinnamon + quinoa + grapeseed oil + honey + raisins

What goes into your favorite mixture?

Dyeing Eggs with Natural Colors

t59nzEM5SgyLWcWlti313Q.jpg

I first started exploring natural food dyes when trying to decorate my son’s birthday cake without using artificial colors from a little squeeze bottle. I knew there had to be ways to get vibrant colors out of actual foods. After discovering how to make pink, blue, green and yellow frosting, I moved on to coloring pasta, which is by far the most forgiving medium for natural food coloring. One can easily adjust moisture levels in pasta dough, which absorbs colors from solids, pastes, liquids and powders. Eggs, which are dyed in a quick bath of a colorful liquid, posed a new set of challenges.

Since we dunk eggs into liquid dyes, the pigments from colorful foods need to be transferred as much as possible to the water they are cooked in before straining off solids like shredded beets or dried flowers. And ground spice powders, like turmeric and paprika would ideally dissolve into the liquid. Not the case. Many formulas for natural dyes will tell you to use powdered turmeric for yellow. I love spices and figured I’d try others too like paprika, sumac, & chili powder. Why not?

Left: Speckled orange egg created with ground turmeric, ground paprika and oil based dye. Right: Blue polka dot egg created with butterfly pea flower dye and stickers.

Left: Speckled orange egg created with ground turmeric, ground paprika and oil based dye. Right: Blue polka dot egg created with butterfly pea flower dye and stickers.

It’s challenging to get clear vibrant color from these ground spices. First, ground spices are fat soluble, which means they work better with oil to break down and disperse their colors. But dunking an egg in oil sounded unorthodox and messy. So I followed the advice and simply simmered ground spices in boiling water for 20 minutes & then strained. The color was there, but it required a multi-hour, if not an overnight soak to dye eggs, and it left a little grit on the eggs, no matter how fine the strainer. So I revisited spices 101 and decided to bloom them first (or sauté them in a little bit of oil) before adding some water to make the liquid dye. The colors were certainly more vibrant and adhered in under 20 minutes, but the oil left a splotched rather than smooth finish on the egg - check out the orange speckled egg made from a combination of paprika and turmeric. Up next, I will attempt a dye made 100% from the ground spices bloomed in oil.

Fresh turmeric root. Grated.

Fresh turmeric root. Grated.

So, how do you get the best clear liquid yellow dye? If you have it available, fresh grated turmeric root works best. I simmered it in water just like the other fresh vegetables, and then strained off the solids. While the turmeric root itself appears orange, the liquid it creates makes a beautiful soft and natural yellow. If fresh turmeric root is not available, shredded golden beets work as well.

Top left: blue butterfly pea flower dye; Top right: yellow turmeric root dye; Bottom: Green dye made from combining

Top left: blue butterfly pea flower dye; Top right: yellow turmeric root dye; Bottom: Green dye made from combining

I had such success adding greens of all shades and varieties — sautéed, steamed, juiced and blanched spinach, kale, parsley & chard — to pasta dough & frosting that I didn’t expect it to be so challenging to dye eggs green. And, green eggs & ham, right? Wrong. For egg dying, not only do the green colors become terribly diluted in liquid, but the key ingredient required for getting dye to adhere to eggs destroys the green pigments. We add vinegar to egg dyes to create an acidic mixture that reacts with the calcium in the egg shell, allowing colors to be absorbed. While this acid creates vivid blues and bright pinks, any acid (lemon juice, wine, tomato sauce) deteriorates green rapidly and transforms it to an unappetizing olive or brown. The answer? Create vibrant greens by combining yellow and blue dye immediately before dunking eggs.

28AD9733-A57F-411C-9A48-452CB32EB79F.jpg

How to Produce a Rainbow of Natural Dyes

To make most types of natural liquid dye:

  1. Boil or steep vegetables (1 cup), spices (1 tablespoon), or dried flowers or teas (1/2 cup) in water (1 1/2 - 2 cups) for 10-20 minutes.

  2. Strain through a fine mesh strainer. Discard, compost or reuse the solids.

  3. Add vinegar and stir. Use ~1 tablespoon vinegar to 1 cup liquid dye. Use less for acidic mixtures like berries cooked in lemon juice.

Steep: to soak (food, tea, etc.) in hot water so as to extract its flavor or color or to soften or reconstitute it

Boil: to cook (food) in boiling water over a heat source


Recommended formulas

For a quick reference list of formulas for these and a full rainbow of dyes, click here.


General Tips and Hacks for Dying Eggs

Butternut Squash & French Lentil Stew

This blog post is a wee bit misleading. While I intend to give you a straightforward recipe for a hearty health-supportive one-pot wonder perfect to combat today’s winter chill from Florida to Maine and New York to Chicago, I’m also going to give you the tools to make countless plant-based stews out of any ingredients you’re craving or have on hand. If you’re just here for the Anti-Inflammatory Butternut Squash and French Lentil Stew, click the link for the no-frills version pronto. But if you want to know how to make stew for days, without eating the same one twice, read on… (illustrations coming some day soon).

First, the formula for any Vegan Gluten Free Stew

What you need:

But Chef Laura, how do I know what pairs with what? I hear this question a lot. I leave with you a few tips:

  • what grows together goes together (seasonally, in the same parts of the country/world, etc.)

  • do a quick internet search for your ingredient in question and see what recipes come up not for the recipe itself but to see what others have paired with it

  • pick a genre or cuisine and choose ingredients to pair based on that cuisine’s classic combinations

  • and more you can read more strategies in this earlier blog on using what you have on hand.

  • Cooking oil (coconut, olive, canola)

  • Aromatics (ginger, garlic, onion, scallion, turmeric, chili peppers, etc.)

  • Salt (kosher or sea)

  • Dried spices

  • Pastes (curry paste, tahini, nut butters, tomato paste, etc.)

  • Liquids (water, stock, coconut milk, nut milks, juice, apple cider etc.)

  • Vegetables (raw, canned, frozen)

  • Cooked legumes (chickpeas, lentils, beans of all varieties, etc.)* or uncooked legumes but be sure to add sooner with more liquid or cook separately, then add

  • Acid and/or umami (lemon juice, vinegar, wine, soy sauce, umeboshi, tomato)

  • Greens and/or fresh herbs

What you do:

  1. In a large stock pot, heat cooking oil over medium high heat.

  2. Add aromatics and a pinch of salt. If using onion, allow to soften before adding other “smaller” aromatics like garlic to prevent browning or burning.

  3. Add dried spices and seasoning and allow to bloom for a few minutes in the oil.

  4. Whisk in paste(s). [You might add acid, like wine, at this stage].

  5. Slowly incorporate liquid by whisking a small amount into the paste and then gradually adding 1-3 cups. Bring to a simmer.

  6. Add vegetables that need the longest cook time. Bring back to a simmer. Continue to add vegetables in order of their cooking time. Add more liquid if needed or desired.

  7. Add cooked legumes and simmer stew for at least 15-20 minutes more or up to 2 hours to incorporate flavors and reduce slightly. [You might add a touch of acid at this stage].

  8. Just before serving, add any greens or fresh herbs, or simply top the plated stew with fresh herbs and greens.

Tips:

  • Add small pinches of salt at every stage.

  • If you don’t have/like an ingredient, leave it out or substitute something else from its category.

  • Cut vegetables into shapes and sizes that are appealing to eat relative to one another.

  • Amounts are relative -- add more of the ingredients you love, less of those you just want a taste of, and add as much liquid to get the consistency you want for your stew.

  • Add items that need to cook longer first such as carrots and those that cook quickly last, such as corn or frozen peas.

Now for the Soup du Jour:

Anti-Inflammatory Butternut Squash and French Lentil Stew

This hearty and flavorful stew highlights squash and fast-cooking french lentils. It’s spiced with Ras el hanout, a North African and Moroccan spice blend that means “head of the shop”. Ras el hanout is packed with anti-inflammatory agents, like ginger, turmeric and black peppercorn and delivers additional warmth with paprika, cinnamon and cayenne. Plant-based and lowcarb, this stew is thickened with tahini, the middle eastern staple made from ground sesame seeds. A bright finish of crisp spinach leaves and lemon juice give you everything you’re craving in one pot and 40 minutes.

Makes: 5-6 cups, serves 6-8

yH0yqW6hQriShqUiL99sBQ.jpg
i927YFHIRumQT9hrcwOLEw.jpg

What you need:

  • ½ cup french lentils

  • 2 tablespoons olive oil

  • 1 small red onion, diced

  • 1 small yellow or white onion, diced

  • ¾ teaspoon salt

  • 3 cloves garlic, minced

  • 1-2 tablespoons grated ginger root

  • 2 - 3 teaspoons ras el hanout spice (purchased or see my recipe)

  • 2 tablespoons tahini

  • 4 cups low sodium vegetable stock

  • 1 medium butternut squash, ¼ inch cubes

  • 3 carrots, ¼ inch thick half moons

  • Juice of 1 lemon

  • 1 bunch of spinach, about 2 cups leaves, torn

  • Freshly cracked black pepper

What you do:

  1. Rinse the lentils and soak in a bowl of hot tap water for about 10 minutes (or until it is time to add them to the stew).

  2. Heat olive oil in a soup pot on medium high heat. Add the onion and a few pinches of salt. Sauté until soft, about 3 minutes.

  3. Add the garlic, ginger and a pinch of salt. Sauté about 1 minute longer.

  4. Whisk in the spice mixture and sauté 30 seconds longer.

  5. Stir in the tahini, and then gradually whisk in the stock in a slow steady stream, allowing it to thicken before adding more.

  6. Strain the lentils and add them to the pot with the remaining salt. Bring to a boil, then lower heat to medium and simmer gently about 20 minutes.

  7. Add the butternut squash and carrots and simmer an additional 10-15 minutes or until lentils, squash and carrots are tender.

  8. Taste and season the soup with lemon juice. Add the torn spinach leaves, stir and heat just a minute or two until they wilt. Serve with additional lemon juice and fresh cracked black pepper, if desired.

Stove-top Popcorn

Back in college, my electric air popper was the highlight of my dorm floor, along with the beer die table residing at one end of the hall and the large screen TV at the other. I attracted my neighbors for study breaks (and post-beer die game drumunchies) with the aroma of freshly popping corn. I’ve graduated to not popping popcorn as a means of making new friends, and to using a regular old stove top and lidded pot to make the classic snack. Since my Stove-top Popcorn has impressed and puzzled many guests for Saturday afternoon snacks or movie night at our place, I thought I’d share how you too can make some, followed by a few ideas for yummy toppings.

Since I’ve been making popcorn this way, I have never had an un-popped kernel or burnt popcorn in a batch. I do, however, have occasional overflow of popped corn. But that is only a problem for…no one.

We get our popping corn dried on the cob from Farmer Ted at Windflower Farm, but any bagged popping corn will do.

We get our popping corn dried on the cob from Farmer Ted at Windflower Farm, but any bagged popping corn will do.

What you need:

  • average sized stainless steel pot with a well-fitting lid (I use a 3.5QT pot)

  • cooking oil (canola & olive work best, but you can try others so long as they have a high smoke point)

  • popcorn kernels

  • salt

  • seasoning and flavorings (more on that below)

What you do:

Some seasoning ideas:

Of course you can go with the classic butter and salt topping, but I encourage you to try these variations and use your own creativity.

iMx9x0d3QO2qWiS9S9GHsQ.jpg
OwIaPuuJQtOOY5rcmQ25oQ.jpg
  • Herb Butter: melt butter and mince up any herbs you have on hand, such as thyme, rosemary and parsley. Better yet, if you have some of my herb garlic butter in your freezer, just melt that and toss with your popcorn. Sprinkle with salt and serve.

  • Hot Honey Kettle Corn: Transfer the popped popcorn to a bowl and set aside. In the same pot, over low heat, melt a few tablespoons of butter. Add Mike’s hot honey (or any honey plus a couple teaspoons of dried chili flakes). Add the popcorn back to the pot and toss to coat. Transfer to a bowl. It will harden and get stickier as it cools.

  • Truffle Parmesan: Use olive oil or a combination of olive oil and truffle oil to pop the popcorn. Toss the popped popcorn in melted butter, then sprinkle with truffle salt, grated Parmesan and freshly cracked black pepper.

  • Salt and Pepper: ‘nuff said. Why does salt get all the attention when it comes to popcorn? Don’t leave out the black pepper.

  • Coconut Curry: Use coconut oil to pop the popcorn. Toss popped corn with a curry powder, madras curry or garam masala spice blend you enjoy.

  • Any spice mix plus salt and/or butter is a great addition to popped corn.

Summer Succotash - New England Style

IMG_9345.JPG

It does not get more American than succotash, one of the first dishes Native Americans shared with settlers. The word, meaning "broken corn kernels" comes from the Narrangansett people, who lived in the area that is now Rhode Island. There are many ways to make succotash and an American southerner might eloquently debate a Yankee on both contents and process. I favor the New England variety, with a few tweaks, but also just assumed succotash translated to "every vegetable from the garden" or "the entire contents of your produce drawer dumped into a skillet."

Succotash is the whatever you have at the time kind of dish. Actually -- and perhaps I should put this into the procedure itself -- when making succotash, I open all drawers of my fridge, hunt behind jars and open every container of leftovers, stacking every possible vegetable that can be used on the cutting board along with the tomatoes ripening on the counter. As far as I'm concerned, the only required ingredient in summer succotash is fresh local sweet corn previously cooked or raw. The others you can take or leave or substitute, depending on what you have and what you like.

New England Summer Succotash

Yield: Serves 4-6

fullsizeoutput_1962.jpeg

What you need:

  • 2 tablespoons extra virgin olive oil or butter

  • 1 onion

  • sea salt or kosher salt

  • dried ground spices (e.g. smoked paprika, garlic powder, cayenne, optional)

  • 2 sweet peppers (any color bell, anaheim, cubanelle)

  • 3-5 cloves garlic

  • 1 cup beans (see note)

  • 2 medium zucchini or summer squash

  • 2-3 cups fresh corn kernels*

  • 1/4 cup water

  • 1-2 medium tomatoes or handful of cherry tomatoes

  • 1-2 tablespoons fresh herbs (thyme, parsley, basil, oregano, chives, rosemary), chopped

What you do:

  1. Cut all vegetables into a similar size and shape.

  2. Heat a large heavy bottomed skillet (cast iron if available) over moderately high heat. Heat the oil or butter and add the onion with a few pinches of salt. Sauté until soft and lightly browned, about 5-8 minutes.

  3. Add spices if using and sauté about 1 minute.

  4. Add the peppers, garlic, a pinch of salt and sauté until peppers are softened.

  5. Add fresh beans (if using), zucchini and corn kernels with a few more pinches of salt. Sauté 1-2 minutes. Add the water and cook until liquid is absorbed.

  6. Add the tomatoes and cook until they break down. Add cooked dried beans if using.

  7. Right before turning off the heat, add the fresh herbs.

Note on beans: Traditional New England succotash uses cranberry or "cattle beans" like the ones pictured here. See that beautiful cranberry color marbled throughout? If you can get fresh cranberry beans straight from the shell for your summer succot…

Note on beans: Traditional New England succotash uses cranberry or "cattle beans" like the ones pictured here. See that beautiful cranberry color marbled throughout? If you can get fresh cranberry beans straight from the shell for your summer succotash, that is ideal. Or substitute fresh shelling peas, snap peas, green beans, or lima beans. You can also cook up the dried ones, like you make any dried bean and add to the succotash at the very end.

Variations:

  • Use leftover already cooked vegetables, such as corn boiled on the cob or grilled zucchini and squash. Simply reduce the cooking time for the already cooked vegetables. Add them to the succotash a little later than the recipe calls for, omit the water and reduce the salt.

  • Serve the succotash as a brunch hash topped with crispy fried eggs. Push the succotash to the side, add a touch more oil and fry the eggs in the same skillet.

  • In place of tomatoes, try a tablespoon or two of apple cider vinegar or other vinegar.

  • Use salt pork or bacon for the fat. Render the fat in step 2 in place of oil or butter. Add the onion to the rendered fat and bacon pieces.

  • Crisp up small slices of dry salami in the oil. Remove before adding the onion, set aside and return to the dish at the end.

Fish En Papillote

Fish en papillote or "fish steamed in a packet" is the perfect healthy weeknight-dinner-in-a-flash or prepare-ahead-presentation to amaze your fancy friends dish. I also love it because, like most of my techniques and formulas, it is versatile and can be completed with various types of fish and whatever vegetables, citrus and seasonings I have on hand or feel like using. It works in all seasons - just vary the contents. Spices and fats are optional. So versatile, in fact, everyone in the family can make a personalized version suited to his or her exact tastes and preferences. Last but definitely not least, it conveniently uses up that opened bottle of white wine hanging out in the fridge that no one is ever going to drink.

The amounts listed are for 1 serving or 1 papillote pouch. You can easily multiply to provide as many servings as you need, plus an extra for tomorrow's lunch. This provides a meal unto itself, but also pairs well with additional roasted, steamed or sautéed vegetables, roasted potatoes or steamed rice.

What you need:

  • 3-5 oz fish fillet (cod, arctic char, salmon, monkfish, trout are all good choices)*

  • 1/2 teaspoon extra virgin olive oil or melted butter, optional

  • 2-3 pinches sea salt or kosher salt

  • ground spices, such as black pepper, cumin, cayenne, garlic powder, crushed red pepper flakes, optional

  • 1-2 tablespoons liquid. I prefer a dry white wine, but beer, broth and even water do the trick.

  • 1/4 cup finely sliced or diced vegetables. Use what you have on hand. Carrot, zucchini, bell pepper, cabbage, jalapeño, brussel sprout, and sweet potato are all great.

  • 1 slice of lemon, orange or lime

  • parchment paper cut into large "hearts"

How to prepare the parchment for papillote:

*Note on fish selection: Where you live will determine the best fish choices for you, for freshness and sustainability. Check out this resource by Oceana and Monterey Bay Aquarium's Seafood Watch for a guide on selecting fish. You can choose printable pocket guides that are specific to your region or download their nifty phone app.

What you do:

Note that fish cooked en papillote will cook faster than if you are roasting fish outside of parchment. The steam trapped inside the papillotte is hotter than your oven and will cook fish faster.

Shopping in your Freezer

Miso Ramen Noodle Soup with Broccoli, Edamame and Jalapeno

Miso Ramen Noodle Soup with Broccoli, Edamame and Jalapeno

Every once in a while, I attempt to dig out my freezer and use up all of its contents, to save $ at the grocery store and free up space for new creations and the bounties I'm anticipating from local crops. It's my version of spring cleaning, aptly named using a term coined by my Grammie. She routinely bears gifts of clothing, fabric and housewares. When asked if she's been shopping, she says, "oh yes, shopping in my closet!" 

I've been sharing some of my recent mouth-watering creations out of goods I found stashed in my freezer, which prompted many of you to ask, how big is your freezer? How do I get that out of my freezer?

IMG_6176.JPG

So, in response...

...my freezer is pretty standard. I live in a Brooklyn apartment, after all.

...here's a list of my tips for finding ingredients and inspiration in your own freezer. Armed with these, you too can make a quick meal, prevent waste and avoid the grocery store, but you might also discover a new family favorite, test your culinary muscles and make something out of the ordinary.

  1. Organize it. Occasionally, take everything out of the freezer and sort it, consolidate similar items and return them to the freezer in an organized fashion. For example, put all animal proteins in one corner, vegetables in another, and stack ready-made meals, like soups and stews together. I also use a narrow bin for lining up my purées and sauces in their liquid storage bags (I use re-purposed breast milk storage bags I have in excess).

  2. Choose wisely. Either randomly select two items, such as one protein and one vegetable to give yourself a challenge or choose two to three items you know go together well (more on that later). Better yet, have your partner, child, roommate, or sister that you're texting, choose the items for you. Set those chosen items in the fridge or out to thaw. Now you're stuck with those, Chopped style. So make it work.

  3. Use formulas. Refer to a list of go-to recipe templates. The types of recipes I'm talking about are best described as "plug and play". Think of general recipes that have a base, a procedure you are familiar with, and a few interchangeable components. My templates include pasta dishes, soup, stew, muffins, quiche, pizza, risotto, grain bowls, pot pie, or stir fry.

  4. Brainstorm flavor combinations. Determine which ingredients and flavors go together. Did you just take peas and ground turkey from the freezer? So ask yourself, what else do I make with peas or what spices and vegetables were in that poultry dish from my favorite restaurant? Or conduct a quick internet search for recipes by ingredient. One resource I love for brainstorming flavor and ingredient combinations is the Flavor Bible. A dear friend gave me this book years ago and I still reference it weekly. Just learned that there is a Vegetarian Flavor Bible now too.

  5. Ignore measurements. It does not matter if the package is half full, or if you don't have as much sauce as you usually use. It's not an exact science. Just add more or less liquid or crunch as needed.

  6. Set a time limit. Again, Chopped style. If you limit how much time you have to either think about what you are going to make with the freezer finds or actually cook dinner or both, you will force your creative side without losing too much time.

  7. Re-purpose freezer finds. Turn something you don't like into something you love or that the kids and picky eaters of the world will eat. Change the texture and overall structure of the ingredient. For example, I had a purée of steamed sweet potatoes, apples and carrots that the baby suddenly turned his nose up at (after liking it for a few months). That purée just became the star ingredient in my famous sweet potato waffles. And all the rejected old bread ends that will never qualify for a BLT or PB&J make beautiful garlicky croutons for a panzanella salad.

  8. Allow yourself an out. You do not have to eat your failures. If it is truly terrible, you can toss it, compost it or feed it to the dog. It's okay, you shopped in your freezer and you gave it a try. Or you might even re-purpose it to another step. We made a risotto out of crab meat, sofrito and peas. It was just okay, and there was a lot remaining, so rather than force ourselves to eat the leftovers, I thought, why not mix in some cheese, roll into balls and pan fry for arancini magic!

And many of you want to know, how do I get all of these things into my freezer to begin with? That's a topic for another day or series of posts. Stay tuned and in the meantime, see here for my chowder freezing tip.

Variations on Hummus

fullsizeoutput_a89.jpeg

Stop rolling up to the school potluck with a store-bought tub of ordinary hummus and some crunchy carbs for dipping. Hummus is simple to make from scratch. And it does not need to be boring. You can add spices, change up the acid and even hide some vegetables in it. Here's a straightforward formula followed by various modern spins, including a colorful roasted beet hummus you can spread on your kids' sandwiches. My sweet potato black bean variation below is exactly what your Superbowl party ordered. Bonus: these spreads make great baby food too, especially to pack a smooth high protein punch for a little peanut like mine who needs to pack on some pounds.

Basic Hummus Formula

Makes about 1½ cups

What you need:

  • 1-2 cloves of garlic

  • 1 1/2 - 2 cups cooked legumes (chickpeas, black beans, white beans, lentils, etc.)

  • 1-3 Tablespoons tahini

  • 1/4 cup oil (olive, canola, avocado, etc.)

  • 1-2 Tablespoons acid (lemon juice, lime juice, apple cider vinegar, etc.)

  • salt & pepper to taste

  • 1/2 - 1 cup cooked vegetables (optional)

  • 1-3 teaspoons ground toasted spices (optional)

What you do:

Simply put all ingredients (except the acid, spices and salt) into a food processor and purée until smooth. Taste and add acid, spices, and salt gradually to get desired texture and taste. You can always add more salt, acid and liquid but it is difficult to take it away or add more of all of the other ingredients if you go overboard on, say, the lemon juice and cayenne. If your spread is too thick, add more acid (lemon juice, vinegar, etc.) or plain old H2O if you want to thin it without altering the taste too much.

Note on beans: When using canned beans, I drain them and rinse off the liquid first to get rid of any extra salt or any taste imparted by the canning process. You can also easily cook your own beans. More on that in a future post.

Try these variations:

  • Add a roasted beet and toasted ground cumin, cinnamon and cloves. You could also follow my recipe for Roasted Beet Hummus.

  • Substitute a sweet potato for the beet and roast without foil. Use cumin, cayenne, dried ground chipotle and/or smoked paprika for the spices. Substitute black beans or stick with the chickpeas.

  • Instead of beet or sweet potato, use ½ cup of any cooked vegetable (skins removed, roasted, grilled, or steamed), such as broccoli, red bell peppers, carrots, or squash.

  • Add ½ cup of prepared pesto and decrease the olive oil to 2 tablespoons.

  • Use lime juice, apple cider vinegar, sherry vinegar or white wine vinegar in place of the lemon juice.

  • Add an entire head of garlic roasted in olive oil. Decrease the olive oil to 2 tablespoons. Use chickpeas or substitute navy or cannellini beans.

Presto Pesto

Pesto is a comforting stand by, a loyal friend that rarely lets you down. Here are 5 reasons I love to produce pesto:

  1. You can assemble it in a matter of minutes.

  2. You don't need a recipe or any specific ingredients. See below for the "formula" and suggested combinations. It's a great way to use up herbs you have on hand (Do you have an entire $2 bunch of cilantro remaining after your recipe called for a teaspoon minced for garnish? Are you pruning back your herb plants to promote their continued growth? Did you get bundles of herbs in your CSA bounty?)

  3. It can be used immediately, saved in a jar and eaten throughout the week or frozen in batches for a February day when the herb plants have all but dried up.

  4. It's kid helper-friendly. Little hands are great at plucking leaves from stems and can help blend items safely in a locked food processor.

  5. Pesto has endless applications: top fish before baking it, thin it out and use as a sauce to spruce up a protein presentation, mix into a pasta, risotto or other grain dish, dress some zucchini "noodles", spread on a sandwich, mix into scrambled eggs or quiche, or top a soup.

Presto Pesto - A Formula
Once you have this basic formula for pesto, you can make all types with whatever leaves you have.
 
Here's what you need:

the measurements are guidelines, not requirements

the measurements are guidelines, not requirements

  • 2 cups of aromatic leaves (basil, mint, cilantro, parsley, arugula, even carrot and radish greens)

  • 2-4 cloves of garlic (or garlic scapes or green garlic)

  • 1/4 cup lightly toasted nuts or seeds (pine nuts, walnuts, almonds, pumpkin seeds)

  • 1/2 cup oil

  • 1/4 cup grated cheese (parmesan, pecorino romano or another hard cheese, optional, see note)

  • salt and pepper to taste

 
Here's what you do:

Put all that stuff in a food processor (like one of these), and just let it go. If you want to be more technical, purée the leaves, garlic and nuts first until ground, evenly sized, and well combined. Scrape down the sides, replace the lid, and then process again while streaming the olive oil into the mixture slowly. Add cheese, salt, and pepper at the end to taste and process again until evenly incorporated.

Some recipes suggest adding lemon juice or zest which provides a nice balance of flavor. However, be careful with the acid. It will turn your greens to a less appetizing olive color. If at all, only add right before serving and not if you plan to store your pesto for any length of time.
 
*Note: you can also go vegan and omit the cheese entirely or replace it with a tablespoon or so of miso paste or a teaspoon of umeboshi paste to get that umami flavor you expect in a pesto. We often omit the cheese for a certain member of the family who is cheese-phobic. (I know. Eye roll, plus incredulous look that says, "how is it possible that an adult human does not like cheese?" Don't get me started. You will read many other posts from me about avoiding & replacing cheese, so you are in luck if you cook for a lactose intolerant or simply cheese intolerant person.)
 
Here are some of my favorite combinations:

IMG_8245.JPG
  • basil + pine nuts + olive oil + garlic scapes - garlic cloves

  • parsley + walnuts + walnut oil

  • arugula + pine nut + olive oil

  • mint + almond + canola oil

  • oregano + hazelnuts + hazelnut oil

  • mint + pistachio + garlic + olive oil

  • cilantro + coconut meat + coconut oil - cheese (technically not a nut, but it fits the formula)

  • radish greens + pistachios + parmesan + olive oil

  • beet greens + walnuts + ginger - garlic

You can also mix and match herbs and nuts. Play around with it. There are few rules in pesto. What tastes good to you? What combinations do you use?